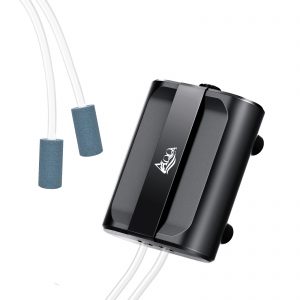
In the world of fish enthusiasts, providing a stable and suitable water temperature for the aquarium is crucial. Although commercially available aquarium heaters are convenient, they can be expensive and sometimes fail to meet individual needs. Today, let’s learn how to DIY an aquarium heater, which is both economical and customizable according to the specific conditions of your aquarium size, fish species, and more.
I. Preparation Materials
- Waterproof Heating Element: This is the core component of the DIY heater. You can purchase it at an electronics market or online. When selecting, ensure its power matches the size of your aquarium to avoid overheating or being too cold.
- Thermostat: Used to control the switching of the heating element, ensuring that the water temperature stays within the set range. Similarly, choose a waterproof thermostat to ensure safe use.
- Insulating Materials: Such as plastic boxes, foam, etc., used to wrap the heating element and thermostat to prevent electric leakage and burns.
- Wires and Plug: Choose waterproof and durable wires and a plug to ensure secure circuit connections.
- Tools: Screwdriver, wire strippers, insulating tape, etc.
II. Production Steps
-
Assemble the Heating Element and Thermostat:
- Fix the heating element onto the insulating material, ensuring it maintains a certain distance from the bottom of the aquarium to avoid direct contact.
- Connect the thermostat to the heating element and set the target water temperature according to the thermostat’s instructions.
-
Encapsulation:
- Completely wrap the heating element and thermostat with insulating materials to ensure no exposed wires or components.
- Use insulating tape to reinforce the encapsulation to prevent water infiltration.
-
Connect Wires and Plug:
- Lead the wires out of the encapsulation and connect them to the plug.
- Ensure the wire connections are secure and use insulating tape to wrap the exposed wire sections.
-
Testing:
- Before placing the DIY heater into the aquarium, connect it to the power supply to test its functionality.
- Observe whether the thermostat can accurately control the switching of the heating element and whether the water temperature can stabilize within the target range.
III. Installation and Use
-
Installation Position:
- Place the DIY heater at the bottom or side of the aquarium, ensuring it maintains a certain distance from the water source to avoid overheating.
- Ensure the heater’s wires and plug are not interfered with or bitten by the fish in the aquarium.
-
Usage Precautions:
- Regularly check the functionality of the DIY heater and the integrity of the encapsulation.
- Avoid prolonged use without supervision to prevent accidents.
- If abnormal water temperature increases or decreases are found, immediately turn off the heater and investigate the cause.
IV. Conclusion
By DIYing an aquarium heater, we not only save costs but also obtain a personalized heating solution. Of course, safety is always the top priority during the DIY process. Therefore, when selecting materials and during production, ensure all components are waterproof and durable, and follow correct circuit connection methods. I hope this tutorial helps you easily create a warm aquarium environment where your fish can grow healthily and happily!


Leave a reply
You must be logged in to post a comment.